May 31, 2022

STENCILED BUTTERFLY

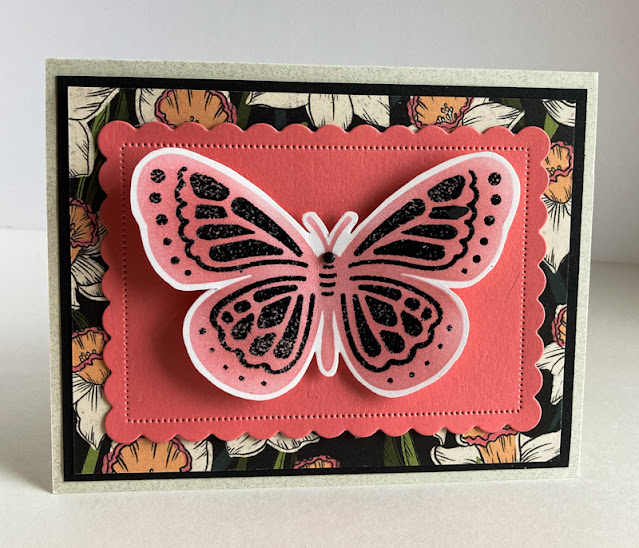
This card features another use of stencils, or as Stampin' Up! refers to them, Decorative Masks. 

In order to create this lovely butterfly, I used two steps of stenciling. 

The first step involved getting the base color, Flirty Flamingo, for the butterfly.The second step was to add detail with VersaMark ink, and then adding black embossing powder, and heat setting it to emboss these details.


I tried to capture the gleam of the embossed portion of the butterfly, 
but it didn't show up all that well.


The photo below shows the Decorative Mask (stencil), which can be found on page 65 of the Mini Catalog, and is called Butterflies and Flowers. It just so happens to be retiring soon.

In the photo, you can see how I have the flower above and the detailed butterfly below covered with tape, so, when adding the base color, I didn't pick up any stray areas.

When I proceeded to the detail area, I did just the opposite, I covered the lower portion of the solid butterfly.

I used the Blending Brushes to do the stenciling. They work so well.


After fussy cutting the butterfly, leaving a small margin of white, I mounted it upon a piece of Flirty Flamingo cardstock die cut with the Scalloped Contours Dies with Stampin' Dimensionals.

I added a black rhinestone to the head portion of the butterfly.

The gorgeous Designer Series Paper behind this was from the Sale-A-Bration DSP called Daffodil Afternoon. 


The perfect finish for this card, which, by the way, could be used for virtually any occasion, was to add it to black cardstock, then to a white card base. 


Have you given stenciling a try with the wonderful Blending Brushes? So simple and satisfying to do!

Butterfly

Smiles.


May 28, 2022

CELEBRATE

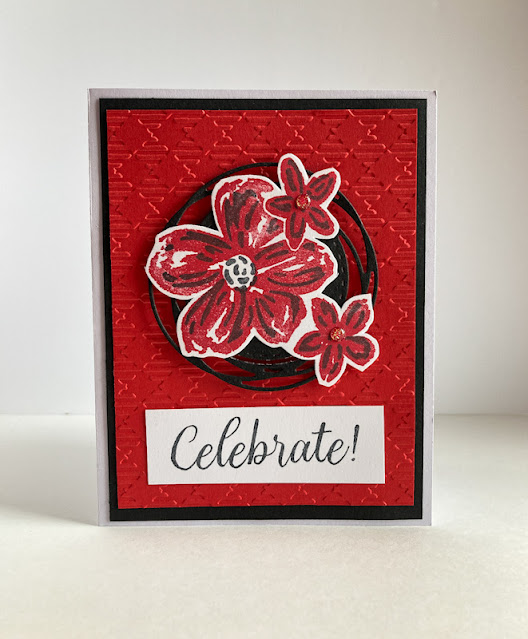
Almost every month, my Paper Pumpkin kit contains very cool stamps, and most of the time a large focal point stamp, such as the trio of flowers in this card.

Cute and very sketchy looking, it was perfect for the main image on a fun card.


Once the card is assembled, it boasts a modest amount of dimension, 
probably requiring extra postage to mail. Or maybe not. Hmmm.


The swirly cirrcular diecut makes a perfect landing place for the flowers.


Have you tried the Gingham Embossing Folder? Cute design!


Hopefully you have your Paper Pumpkin kit handy, 'cause following is a tutorial on how to recreate this cheery card.

SUPPLIES:
White cardstock
Black cardstock
Poppy Parade cardstock

Stamps from Beyond the Horizon Paper Pumpkin kit, March 2022

Memento Tuxedo Black ink

Die cutting/embossing machine
Painted Labels Dies (page 172, Annual Catalog)
Gingham Embossing Folder (page 176, Annual Catalog)
Paper Snips
Stampin' Dimensionals
Poppy Parade gems (retired)

INSTRUCTIONS:
Fold a 5 1/2" x 8 1/2" piece of white cardstock in half, creasing it well with a bone folder.

Add to this card base a 4" x 5 1/4" piece of black cardstock.

Cut a piece of Poppy Parade cardstock to 3 3/4" x 5" and use the Gingham Embossing Folder to emboss it.

Add the embossed piece to the card front.

From black cardstock, die cut the swirly circle. 

On a scrap of white cardstock, stamp the trio of flowers base image in Poppy Parade ink. Then follow with the more detailed stamp in black ink to add some detail to the flowers.

Fussy cut the three flowers together.

Add the cut-out flowers to the center of the swirly circle. Using Stampin' Dimensionals, add this to the card front about 3/4" - 1" from the top of the embossed piece.

Add Poppy Parade embellishments to the centers of the two smaller flowers.

On a 1" x 3" piece of white cardstock, stamp the word "Celebrate".

Adhere the sentiment flat towards the bottom of the card onto the embossed piece.

Do you subscribe to Paper Pumpkin?

Celebratory

Smiles.


May 24, 2022

BECAUSE OF YOU

I love using stencils, but I must admit, I don't think of using them often enough. Stampin' Up! has some really darling -- and inexpensive! -- stencils, which they refer to as Decorative Masks. The set I used for my card is from the Mini Catalog, called Butterflies & Flowers, on page 68.


I used two of the flowers, a Blending Brush, and two colors, Balmy Blue and Mango Melody, to create the cheery background of the card. 

I started with the larger flower in blue and moved it around the 4" x 5 1/4" piece of white cardstock, followed by the smaller flower in Mango Melody. Using the smaller one last makes it easier to fill in gaps left by the larger. 


I loved this happy background so much that I didn't want to cover up just too much of it. So, on white cardstock, I stamped in Balmy Blue the precious sentiment from the Wildflower Path stamp set (page 106 in the Annual Catalog). I then used one of the Tailor Made Dies on page 175 in the Annual Catalog, to cut the sentiment out.

To create a mat for the sentiment -- which would have gotten lost on the background -- I used another of the Tailor Made Dies with Mango Melody cardstock. 

Using some ribbon left over from a past Paper Pumpkin kit, I knotted it through the white tag. Because both tags had holes in the tops, I arranged the ribbon so it covered up the hole in the bottom tag. 

Once the tags were adhered together, I added it with Stampin' Dimensionals to the bottom of the card.

Oh! The card base is Mango Melody cardstock!


What are your thoughs on stencils, or, as Stampin' Up! refers to them, Decorative Masks? Do you use them often? Or, like me, do you forget about them and at times need to be reminded to use them because you ran across your stash of "stencils"? 

They are a great way to make a wonderful background for a card. And, using the Blending Brushes, makes the job that much easier and enjoyable.


Has anything or anyone made your heart smile lately? Share with us!

Stenciled
Smiles.


May 21, 2022

NOTEWORTHY SUNFLOWER

I know this is probably a crummy way to start a blog post, but I am just not sure how I feel about this card.

Originally, I'd thought the combination of Glimmer Paper and Stampin' Blends imagery would be effective. But, now that everything is put together, I, as I've already said, am just not sure.


Once the card was "finished", I'd only had the Gold Glimmer Paper in the bee and behind the sentiment. Something just did not feel right with the sunflower. I finally thought that if I used a 1/8" hole punch to create lots of little dots from the Glimmer Paper and adding them to the center of the sunflower, this would bring everything together. 

Unfortunately, those dots seem to clash with the brown I'd colored the center of the sunflower with. Now, that I have in my possession the ten new neutral Stampin' Blends, I realize that there would be several of the browns that would have been a much better fit with this particular hue of gold.


One thing that I should mention, if you haven't already learned/heard this, is that if you are going to emboss an entire panel of cardstock, do the stamping first! Have you ever tried to stamp over embossing? Not pretty.


At this point, I'm not sure if you even want to know how to make a card such as this one; nevertheless, I am including a tutorial to do so.

SUPPLIES:
Mango Melody cardstock
White cardstock
Black cardstock
Gold Glimmer Paper

Memento Tuxedo Black ink
Stampin' Blends:    Light and Dark Mango Melody (unfortunately not available anymore)
                               Light and Dark Soft Suede (one of the new flesh-colored Blends would work better)

Celebrate Sunflowers stamp set (page 35, Annual Catalog)
Enjoy the Moment (retired)

Die Cutting/Embossing Machine
Subtles Embossing Folder (retired)
Iconic Dies (unfortunately retired)
Mini Stampin' Dimensionals

INSTRUCTIONS:
Fold a 5 1/2" x 8 1/2" piece of Mango Melody cardstock in half, creasing it well with a bone folder.

To this card base, add a 4" x 5 1/4" piece of black cardstock.

You will be doing the main layer on a piece of white cardstock that measures 3 3/4" x 5". Stamp the large sunflower in Memento Tuxedo Black ink in the center. Color the sunflower using any method you are comfortable with.

Emboss this panel with the Subtles Embossing Folder.

Using Gold Glimmer Paper, die cut the bumblebee. Use a Mini Stampin' Dimensionals to add him hovering over the sunflower.

In black ink, stamp a short sentiment onto a piece of white cardstock that measures 1/2" x 1 1/2".

Cut a 3/4" x 3 1/4" piece of Gold Glimmer Paper and add it to the bottom of the card. Adhere a 3/8" x 3" piece of black cardstock on top of the gold. To this, adhere the sentiment.

With a 1/8" hole punch, punch out five dots from the Glimmer Paper. Add these to the center of the sunflower to carry the glimmer throughout.


Seriously, does this card make your eyes hurt? What would you change about it? Or should I just garbage it?

Glimmery
Smiles.


May 17, 2022

GOOD THINGS

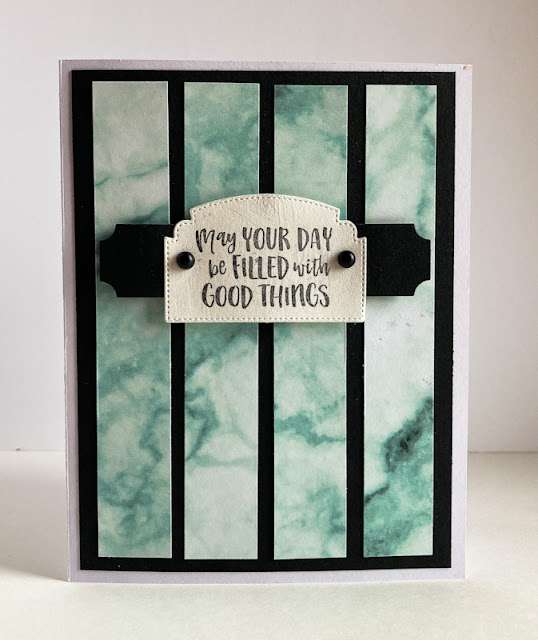
During the most recent Sale-A-Bration, a customer could get a 6X6 pack of cool Designer Series Paper for free. Called Simply Marbleous, one side of the paper featured a marbled look in a color with white, while the flip side was an oily look, suposedly resembling silk. It came in a variety of colors.

While I wasn't a complete fan of the DSP, I did find a good use for it in this card:


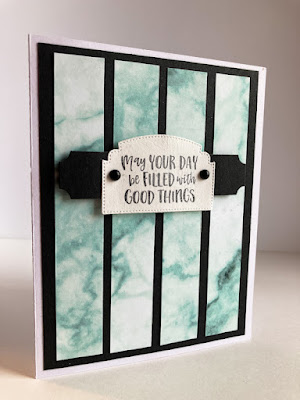
I cut the green marbled side into strips, then mounted them to a black base. I was happy with the result, and finished it off with a few die cuts and the sentiment.


Follow along for a tutorial on how to make a card like this. This process could be done with any Designer Series Paper that doesn't have just too much drama and/or busyness. Give it a try!

SUPPLIES:
White cardstock
Black cardstock
Designer Series Paper of your choice

Black ink

Season's Blessings (unfortunately retired)

A die cutting/embossing machine
Ornate Frames Dies (RETIRED -- boo hoo!)
Project Life Dies (also retired)
Matte Black Dots (page 143, Annual Catalog)
Stampin' Dimensionals

INSTRUCTIONS:
Fold a 5 1/2" x 8 1/2" piece of white cardstock in half, creasing it well with a bone folder.

To this, add a 4" x 5 1/4" piece of black cardstock.

Working on the black cardstock, adhere four 3/4" x 5" strips of Designer Series Paper, spacing them as evenly as possible.

On a scrap of white cardstock, in black ink, stamp a sentiment. Die cut the sentiment with a die that fits your words. I used a die from <the now retired> Ornate Dies.

Add a Black Matte Dot to each side of the sentiment.

Adhere the sentiment piece to a larger die cut label in black.

With Stampin' Dimensionals, add the sentiment piece to the card front.


Stripped
Smiles.


May 14, 2022

FLOWERY EDGE

 This was a really complicated card to photograph. If you look through all the photos, you will see why.


Being a fussy cutting maven, I felt moved to give this card a try. It was a fair amount of work, especially the figuring out of sizes and placement. But I think the final result is worth all the stress.

I knew I wanted a fussy cut flower edge, but wasn't sure how to proceed. 

I cut  a piece of white cardstock to 3 3/4" x 5". I stamped the outlined flowers (from the Color & Contour set, page 97) in black ink towards the bottom of the long side of the piece. I then stamped the color -- Balmy Blue -- and used the Dark Daffodil Delight Stampin' Blend to give the centers a pretty yellow.

Next step was to fussy cut the lower portions of the flowers. These flowers are really simple to cut.


Since I'd used Daffodil Delight for the flower centers, I thought a card base in Daffodil Delight cardstock would be just the ticket. However, I wanted the flowers to hang sort of loose, not attached to the yellow. so I trimmed off 1" from the front of the card base. 

Since I didn't have any ribbon in Balmy Blue, I used my Light Balmy Blue Stampin' Blend to color some white ribbon. After the ribbon had dried I added it above the flowers, taping the ends on the back. 

I knew I wanted to use the beautiful "thanks" from the Amazing Thanks dies (page 169) and cut the large portion from Balmy Blue cardstock and the more detailed piece from Daffodil Delight. I adhered these pieces togehter and mounted the word above the strip of ribbon. 

Once I knew how much space the "thanks" was taking up, I was able to add the second piece of colored ribbon above it, taping the ends to the back of the white cardstock. 


I cut a piece of Balmy Blue cardstock to 3" x 4" and adhered the completed white piece to it.

The final step was to attach the blue piece to the card base, leaving an even margin at the top and the sides and keeping the lower edge even with the cut-off Daffodil Delight .


Voila! All my fanagling resulted in a successful Flowery Edged card. 


Flowery
Smiles.


May 10, 2022

SMILING HEART

Have you heard of CAS cards? Clean and Simple? They are cards that have the merest basics, lots of white space, but classy in their own right.

I usually don't see myself as especially talented in this area, preferring lots of layers, embellishments and techniques.

Well, seen below is one of my takes on the CAS card.


When I saw the precious stems with added flowers from the Wildflower Path stamp set, I was moved to use these stamps in a clean and simple way. I then finished it off with the beautiful sentiment from the set.


Basically a one layer card, sans extras, it is the type of card that is a dream to mail. Although the sentiment probably dictates that it is a thank you card, I can think of other occasions for which it would be suitable. 


Following is a tutorial on how to make this quick, but effective, card.

SUPPLIES:
White cardstock

Wildflower Path stamp set (page 106, Annual Catalog)

Soft Succulent ink
Flirty Flamingo ink

Die Cutting/Embossing Machine
Subtle Embossing Folder (unfortunately retired. Hope you have yours!)
Wink of Stella

DIRECTIONS:
Fold a 5 1/2" x 8 1/2" piece of white cardstock in half, creasing it well with a bone folder.

Cut another piece of white cardstock measuring 4" x 5 1/4". On this piece, in Soft Succulent ink, stamp one of the branches from Wildflower Path across the bottom and one across the top, flipping the image. In Flirty Flamingo ink, add flowers to the stems.

Add a little Wink of Stella to the flowers.

In Soft Succulent ink, add the sentiment right above the branch on the bottom, but to the right.

Run this piece through an embossing machine inside the Subtle Embossing Folder. It is important to do the stamping BEFORE you emboss the cardstock. Did you ever try to stamp on embossed paper?

Adhere the embossed sheet to the card base.

Send it to someone who makes your heart smile!


Heartful
Smiles.


May 7, 2022

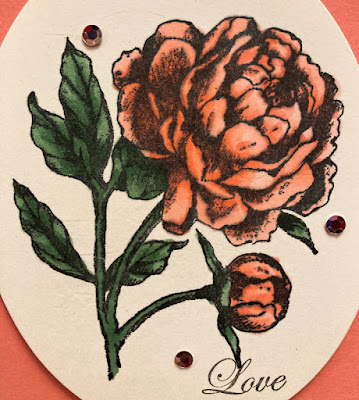
PEONY LOVE

My mom is so precious to me, so for Mother's Day, I wanted to create for her a very special card.


Using my Stampin' Blends to add color to the beautiful retired peony made it easy to create a quite realistic and lovely flower.


The flower cut with an oval die, then set atop a scalloped rectangular piece of Flirty Flamingo cardstock, gave this blossom ample importance. The little touch of love at the bottom makes sure she knows how I feel about her.


Wishing a very Happy Mother's Day to all you mothers out there, whether your children have two or four legs, give or take. Love to you all!

Love-ly
Smiles.


May 3, 2022

#dailycreating DECEMBER 2021

All I can say is that December 2021 must have been a horrible month for me as far as drawing went. And I didn't realize that until I was leafing through my December sketchbook. Yuk.

As a result of my slacking, I only have a measly seven drawings to show you as part of Terry Runyan's #dailycreating group. The members of Terry's Facebook group are encouraged to create something every single day. 

At this point in time yet, I have been pretty faithful about following her prompts.

Only sharing such a small handful of creations for the month, it shouldn't take you just too much time to browse through them.

As I always do, I will note above each drawing what the prompt of the day was and any other interesting information I may have on my subject matter.

#thing on thing

malachite kingfisher/africa


#let's hug day
meerkats

#meerkat-urday
meerkat

#scarf

#thing on thing

#otter-urday
otter

#cardinal

I feel I must say something about a few of the prompts that included "urday". On Saturdays, if we choose not to do #caturday or #dogurday, we can do any #animal-urday. I love that!

Just today, I have started to have prints made of some of my drawings. I am not doing them as Giclee prints, because they are so costly. I have opted for a much more reasonable print. If you would like prints of any of my drawings, please let me know. 

Please keep in mind that these are my original drawings, and are not to be copied or used in any fashion without my express agreement. Thank you for respecting that!

Keep your fingers crossed that the month of January saw me doing better drawings. 

Thanks for looking!

Daily
Smiles.